
Long bottom lines on a banner, when used properly, make it possible to “fly” a banner like a kite and can reduce risks associated with high wind loads.
There are many things to consider when taking action in vertical environments but few can surprise you as much as wind. This is particularly true when dealing with banners where high winds can be treacherous.
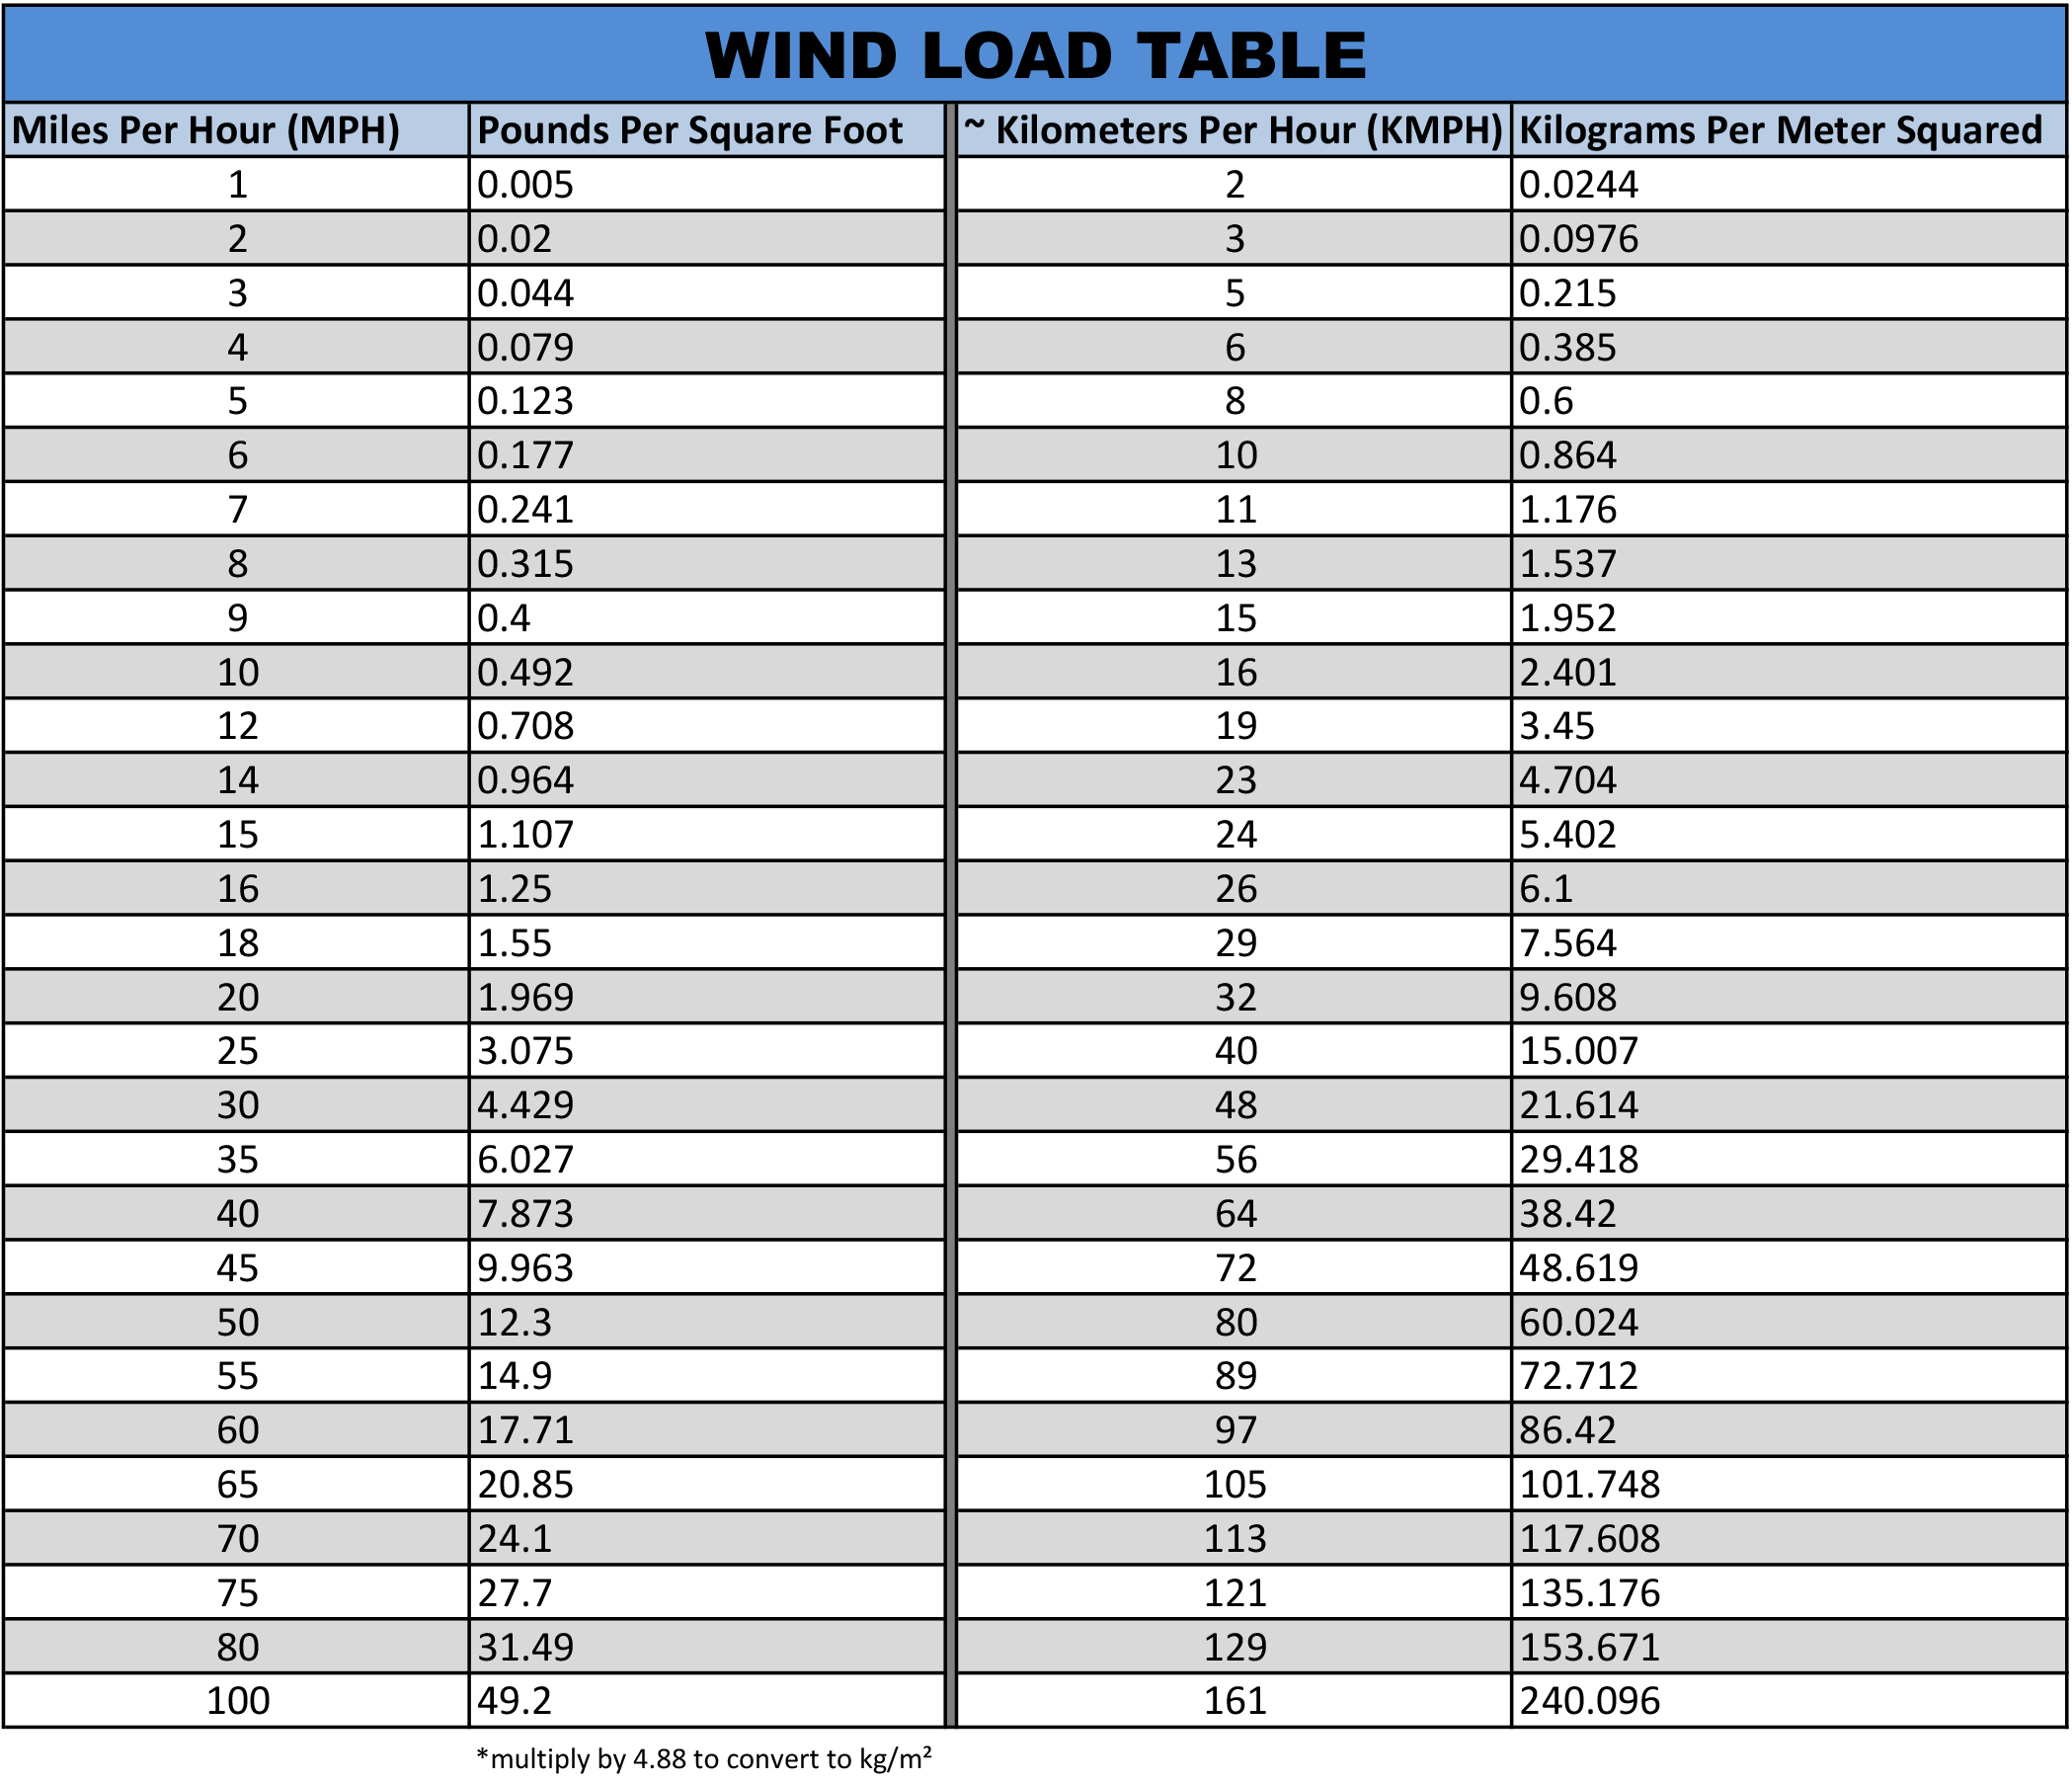
To put this in perspective, imagine deploying a 80 x 20 foot banner on a calm day. You’re unexpectedly caught by 20 mph wind gusts that culminate to over 3,000 lbs of force on the banner — and you’re still attached to the bottom line. You haven’t tied off the lower corner of the banner and are now flying a sketchy sail. “It’s like riding a bull,” explains my good friend Cy Wagoner.
Wind forces can throw things around, tangle ropes, rip banners, push or pull people away from structures, jeopardize work/safety, and put a sudden end to a camp or occupation. In either case, the result could be challenging (to say the least) or even catastrophic.
The following chart is one of many adaptations of the Beaufort Scale and is used to identify wind force on a scale of 0 to 12. This along with wind velocity visual determination methods (see below) are practical tools for assessing wind speed in the field.

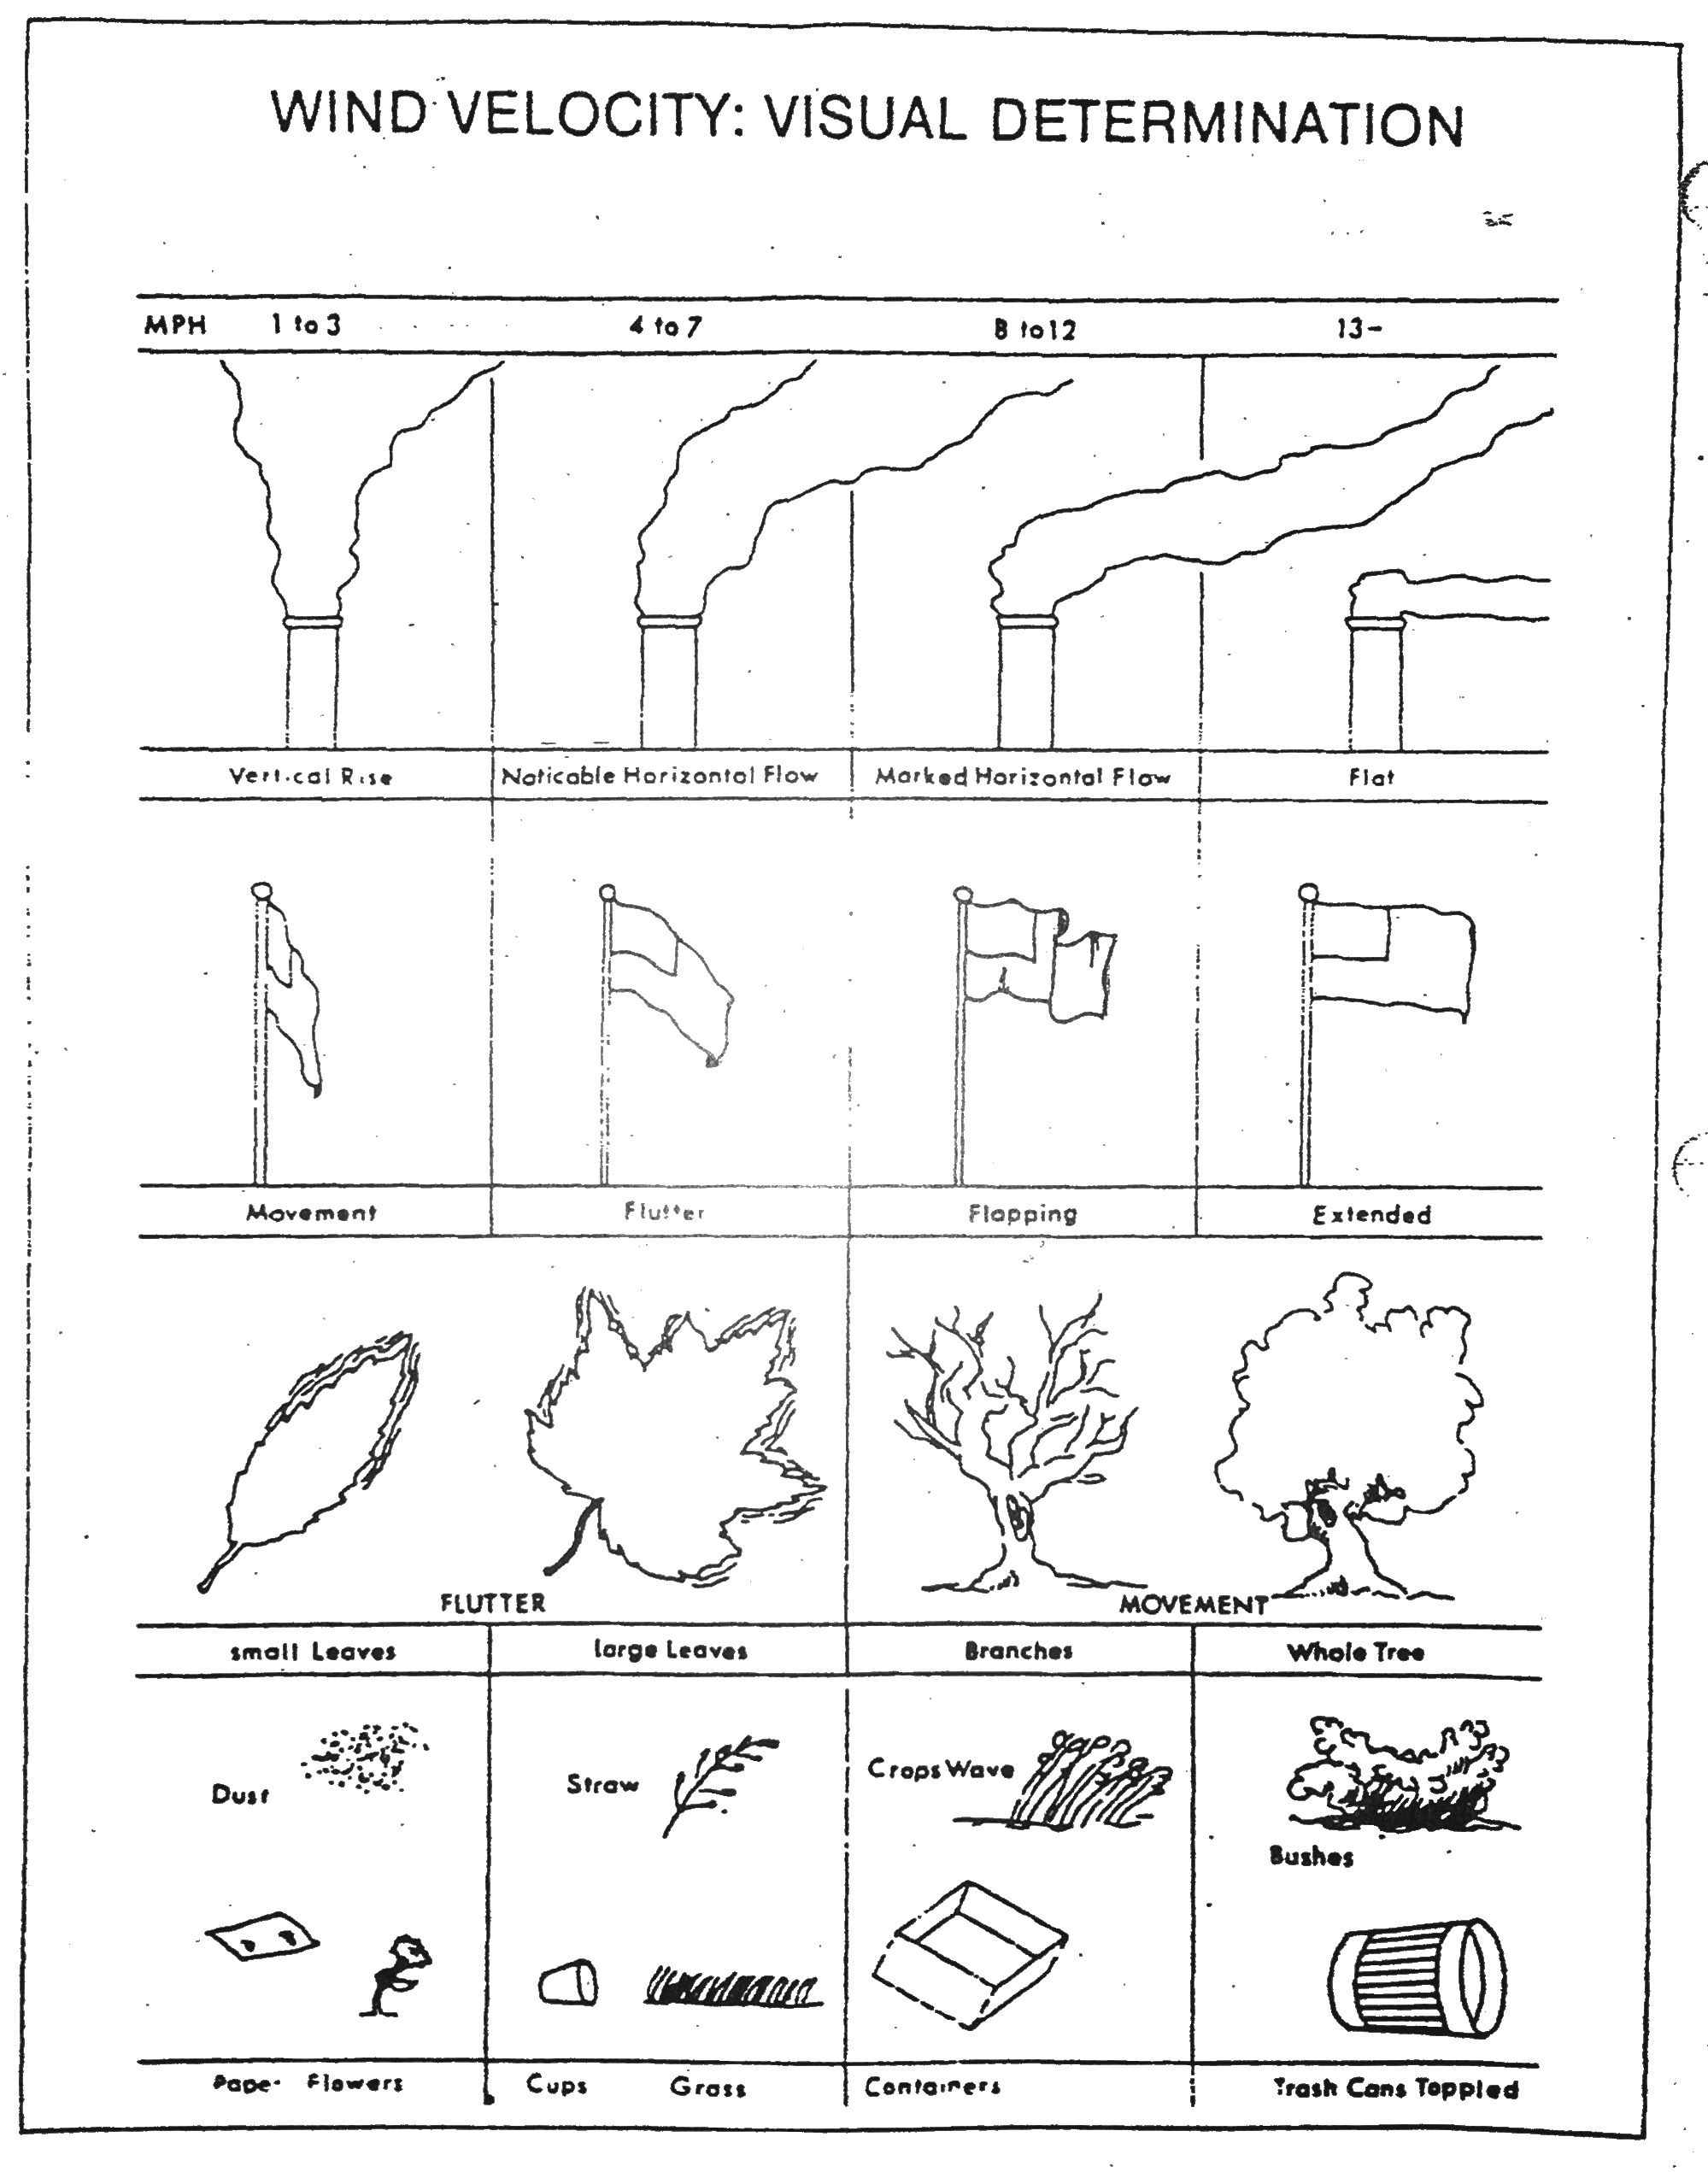
print material – source unknown
Wind Speed and Resultant Loads
When working with banners it’s good practice to consider potential wind loads that a banner may be subject to (the same holds true for any large object). The following table has been adapted from the Scaffold Training Institute manual and offers some conservative numbers for approximating potential wind loads (basic math skills required). It does not account for direction, angle, material types, and other variables so consult a structural engineer or physicist if a high degree of accuracy is desired. Better yet, speak to those with first hand experience.

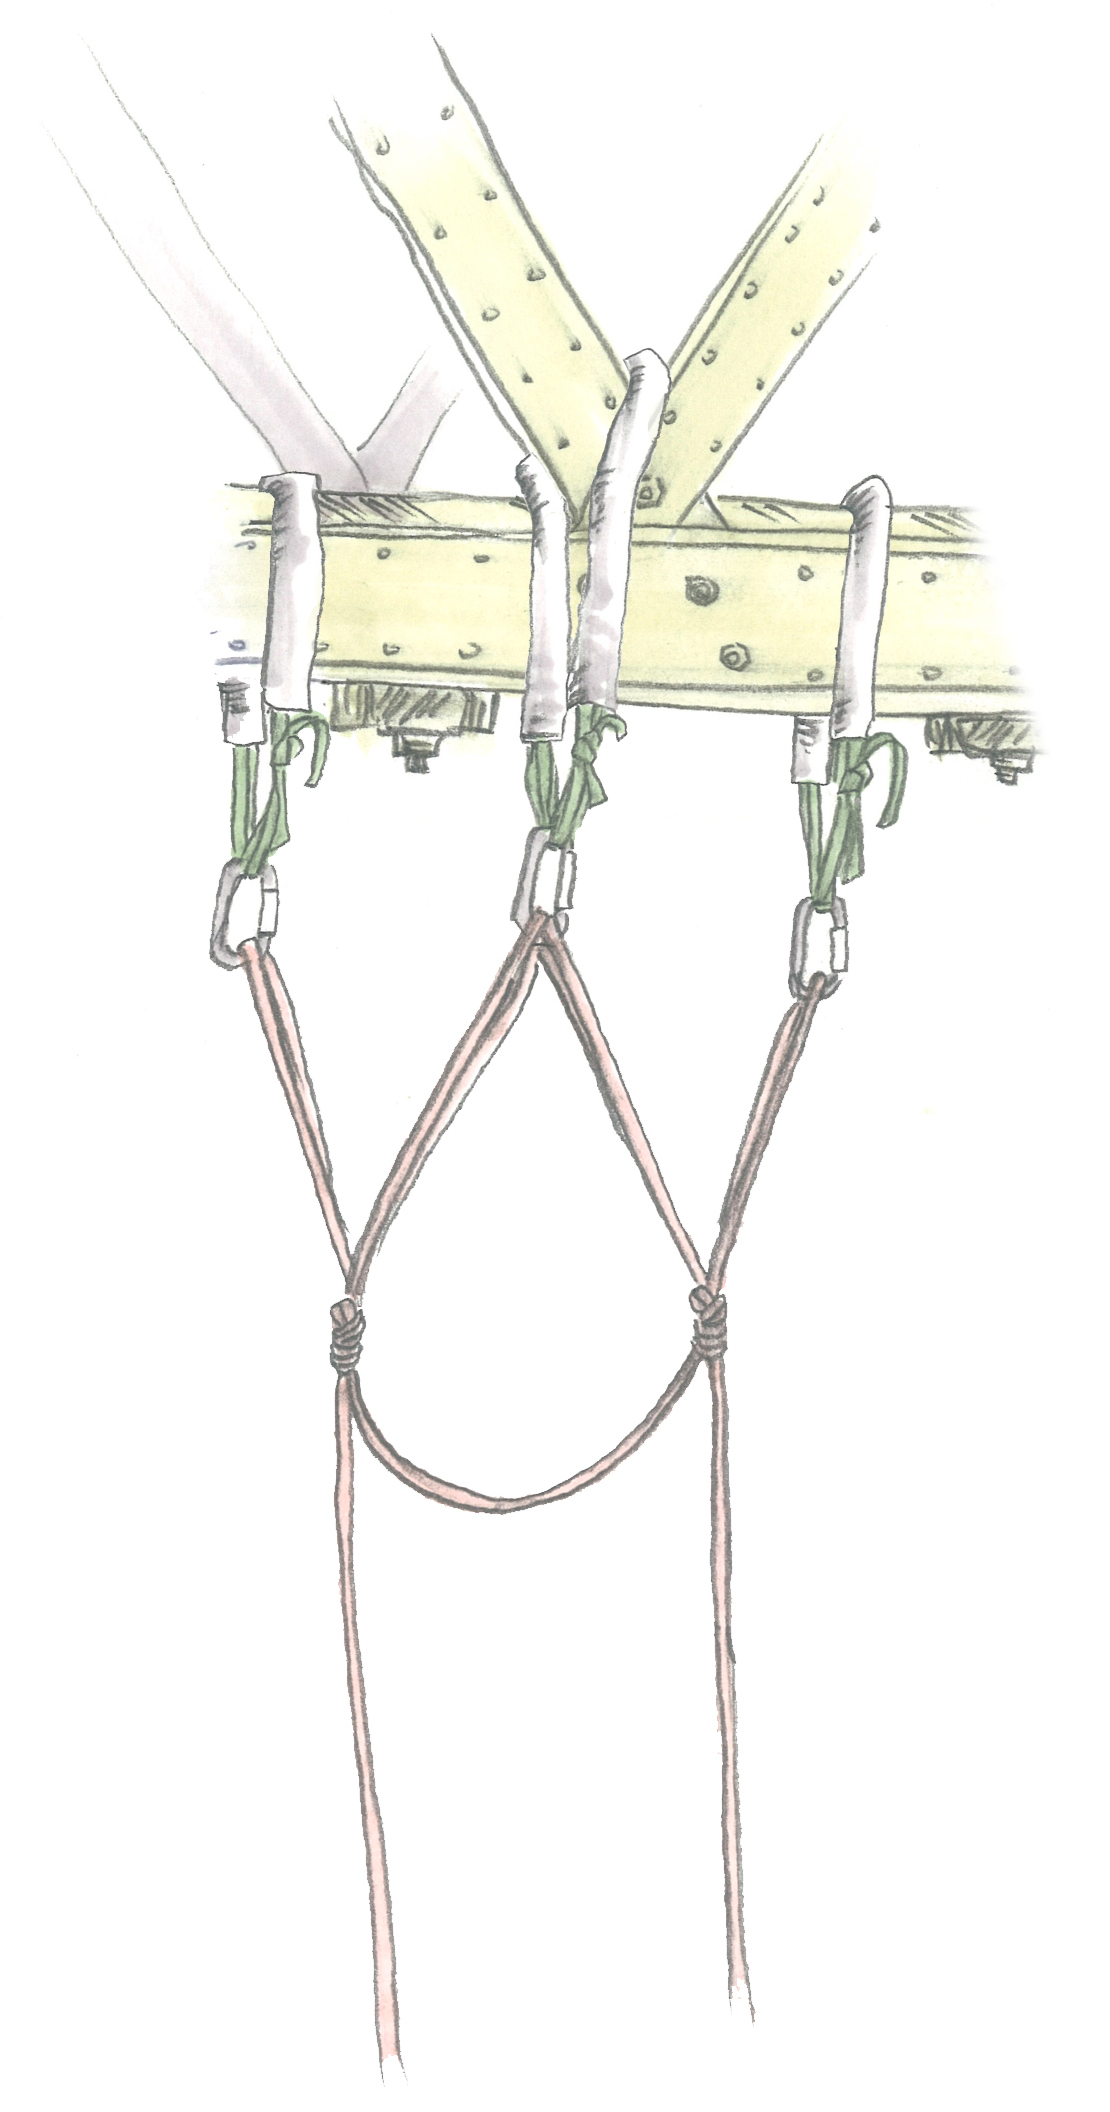
 The potential risk for damage from abrasion or cutting must be evaluated and eliminated anytime softgear makes contact with something. This is particularly true anytime softgear runs over an edge or rubs on itself since the components of softgear, nylon and polyester, are not very resistant to abrasion or heat. Remember – rope and webbing are extremely strong when pulled under load but can cut quickly when subjected to lateral abrasion while under tension.


 Check all connections inline (carabiner to lanyard to you).
 D
D E
E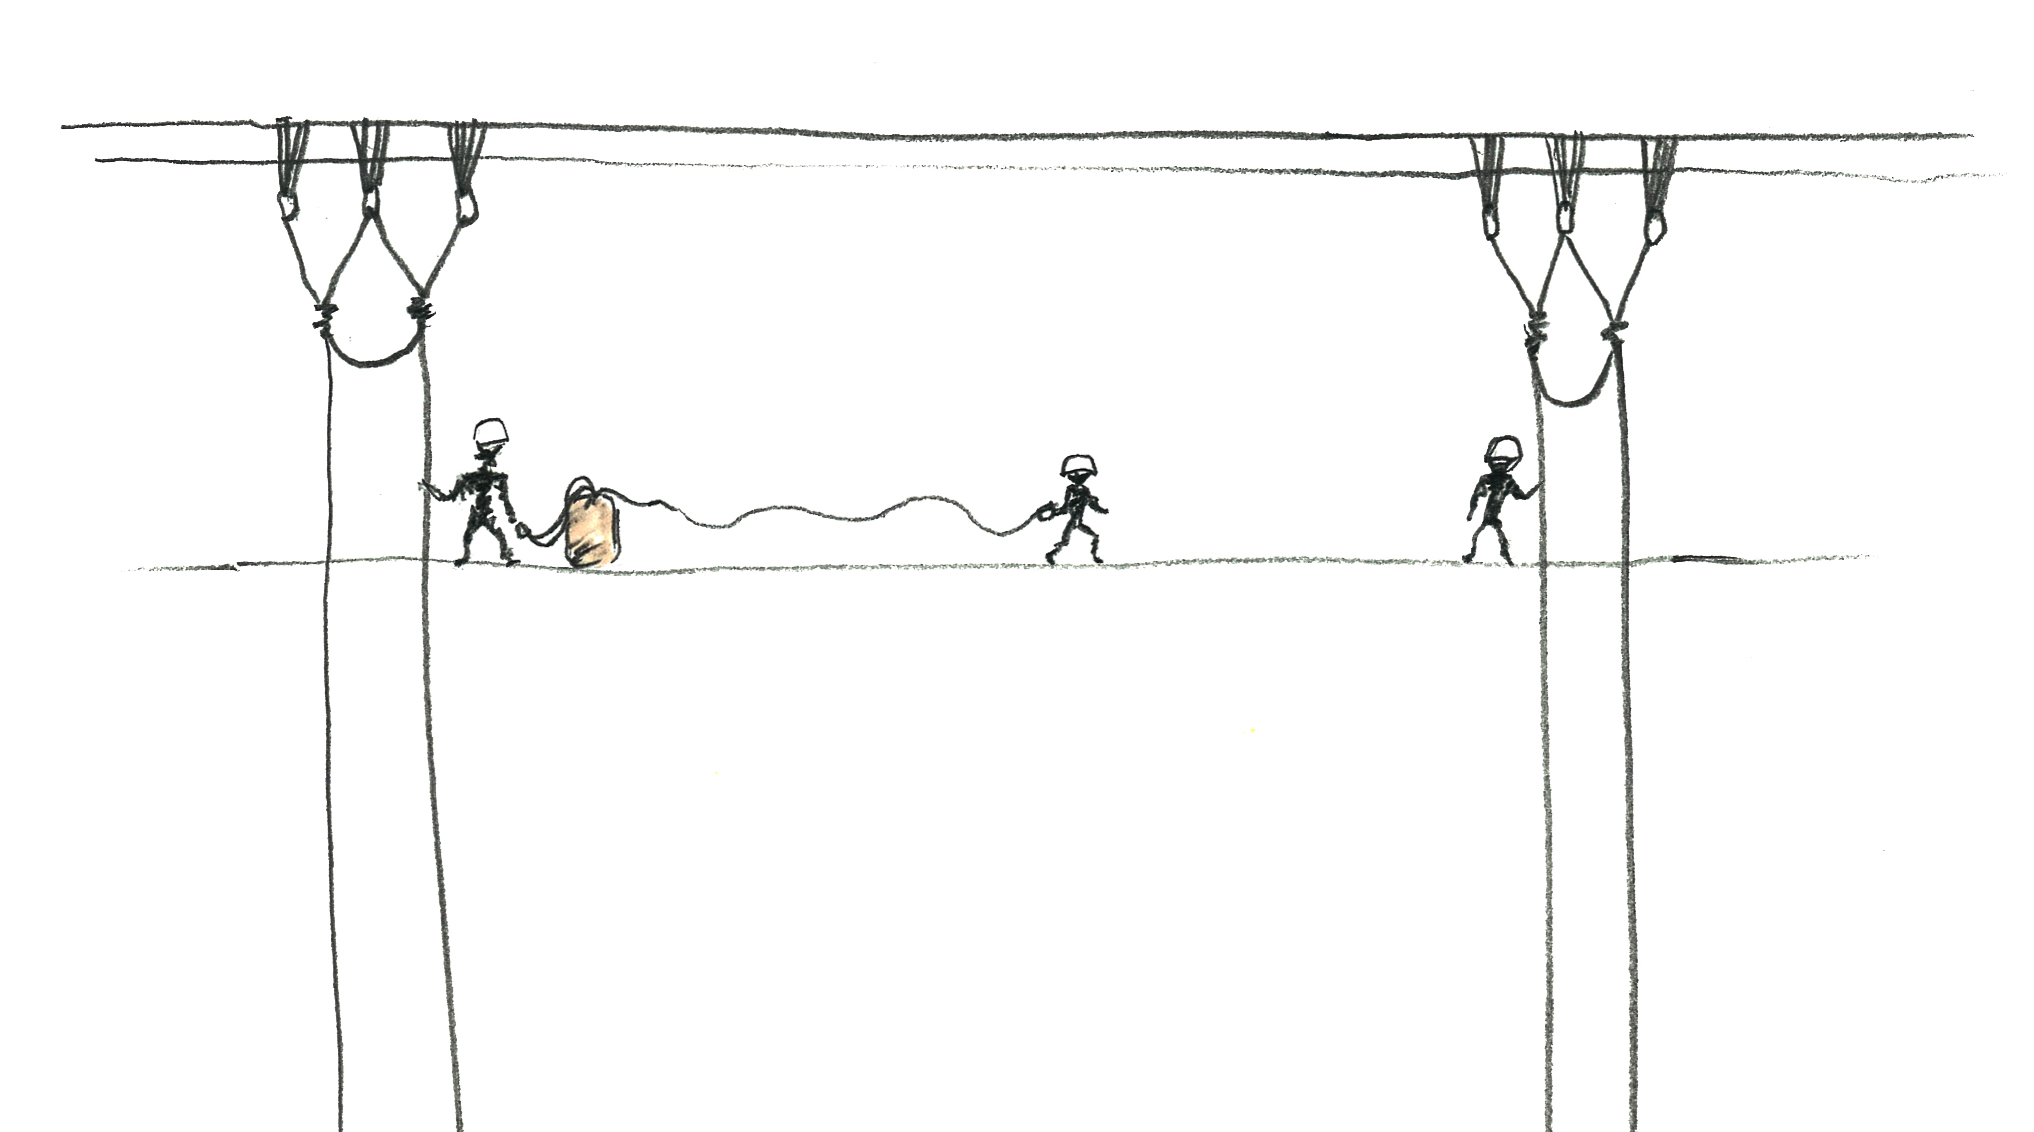
 G
G
