I’m an advocate of creative approaches to ropes and rigging — both in training and in the field. These are the spaces that turn gears and illuminate light bulbs. These are the spaces where we evolve as vertical practitioners.
This little experi ment all started with the simple pull of a magnet fixed to a refrigerator. The magnet popped off in my hand. “That must be around 5lbs of force,” I thought. I just wrapped up a section on load sharing anchors while leading a climb training for Greenpeace USA in the Summer of 2014 and curiosity got the best of me. Could I build an anchor out of these simple magnets? How many would it take? And so it began.
I weigh around 160lbs. Divide that by 5lbs (my estimate of how much force it took to pull the magnet off the fridge) and I was left with 32 — the minimum number of magnets needed to hold my weight. This is assuming that my estimate was accurate, that I would be able to equalize all the magnets ‘perfectly’ and that additional forces don’t exist when getting onto or suspended from an anchor. Knowing better I decided to double the amount but after searching the warehouse for every magnet available I was left with 51 magnets so 51 magnets it was.
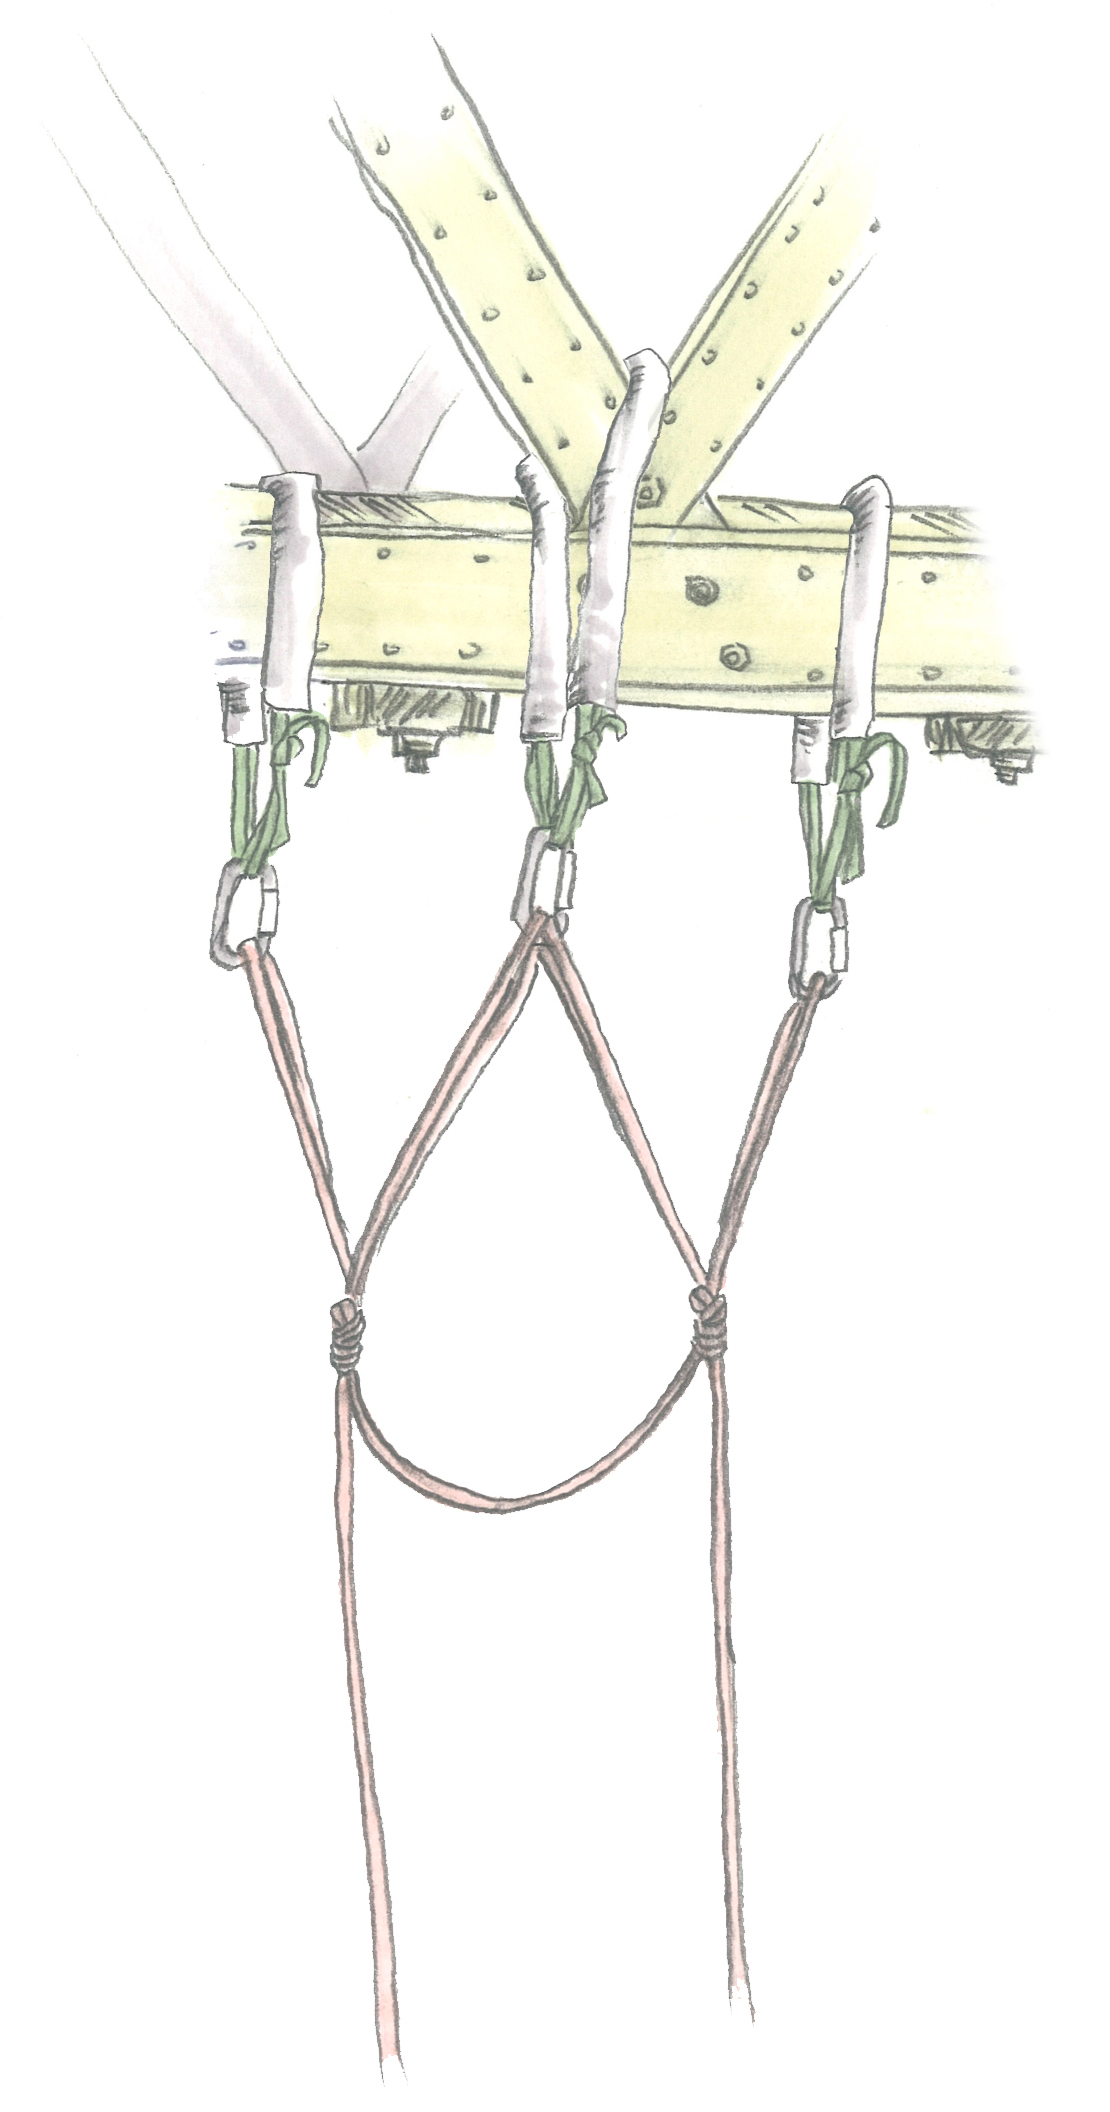
My friend and fellow rope nerd, Van and I quickly got to work tying loops made from random bits of 2-4mm accessory cord to the plastic knobs on each magnet. These would become the individual anchor points for each of the 51 magnets.

photo by Basil Tsimoyianis
We divided these into clusters that we painstakingly equalized into seven load sharing anchors. These seven anchors were then brought together and equalized to create a single master point.

photo by Basil Tsimoyianis
The end result was one master point made from eight equalized anchors whose loads were shared across 51 individual anchor points – in this case magnets.

Untethered magnets will fall if they fail so if using this for training purposes don’t make the same mistakes pictured here – wear a helmet, have a separate belay line, and place a crash pad underneath you. Photo by Basil Tsimoyianis
The anchor was weight tested by people of varying sizes/weights and some even chose to bounce test it. Minimum breaking strength was never determined but I think it’s wise to call this one body weight only.
I’ll be the first to admit that this magnet anchor is not the most practical when it comes to field use but it’s an excellent training tool that highlights the concept of load sharing anchors and importance of equalization.

 Check all connections inline (carabiner to lanyard to you).
 D
D E
E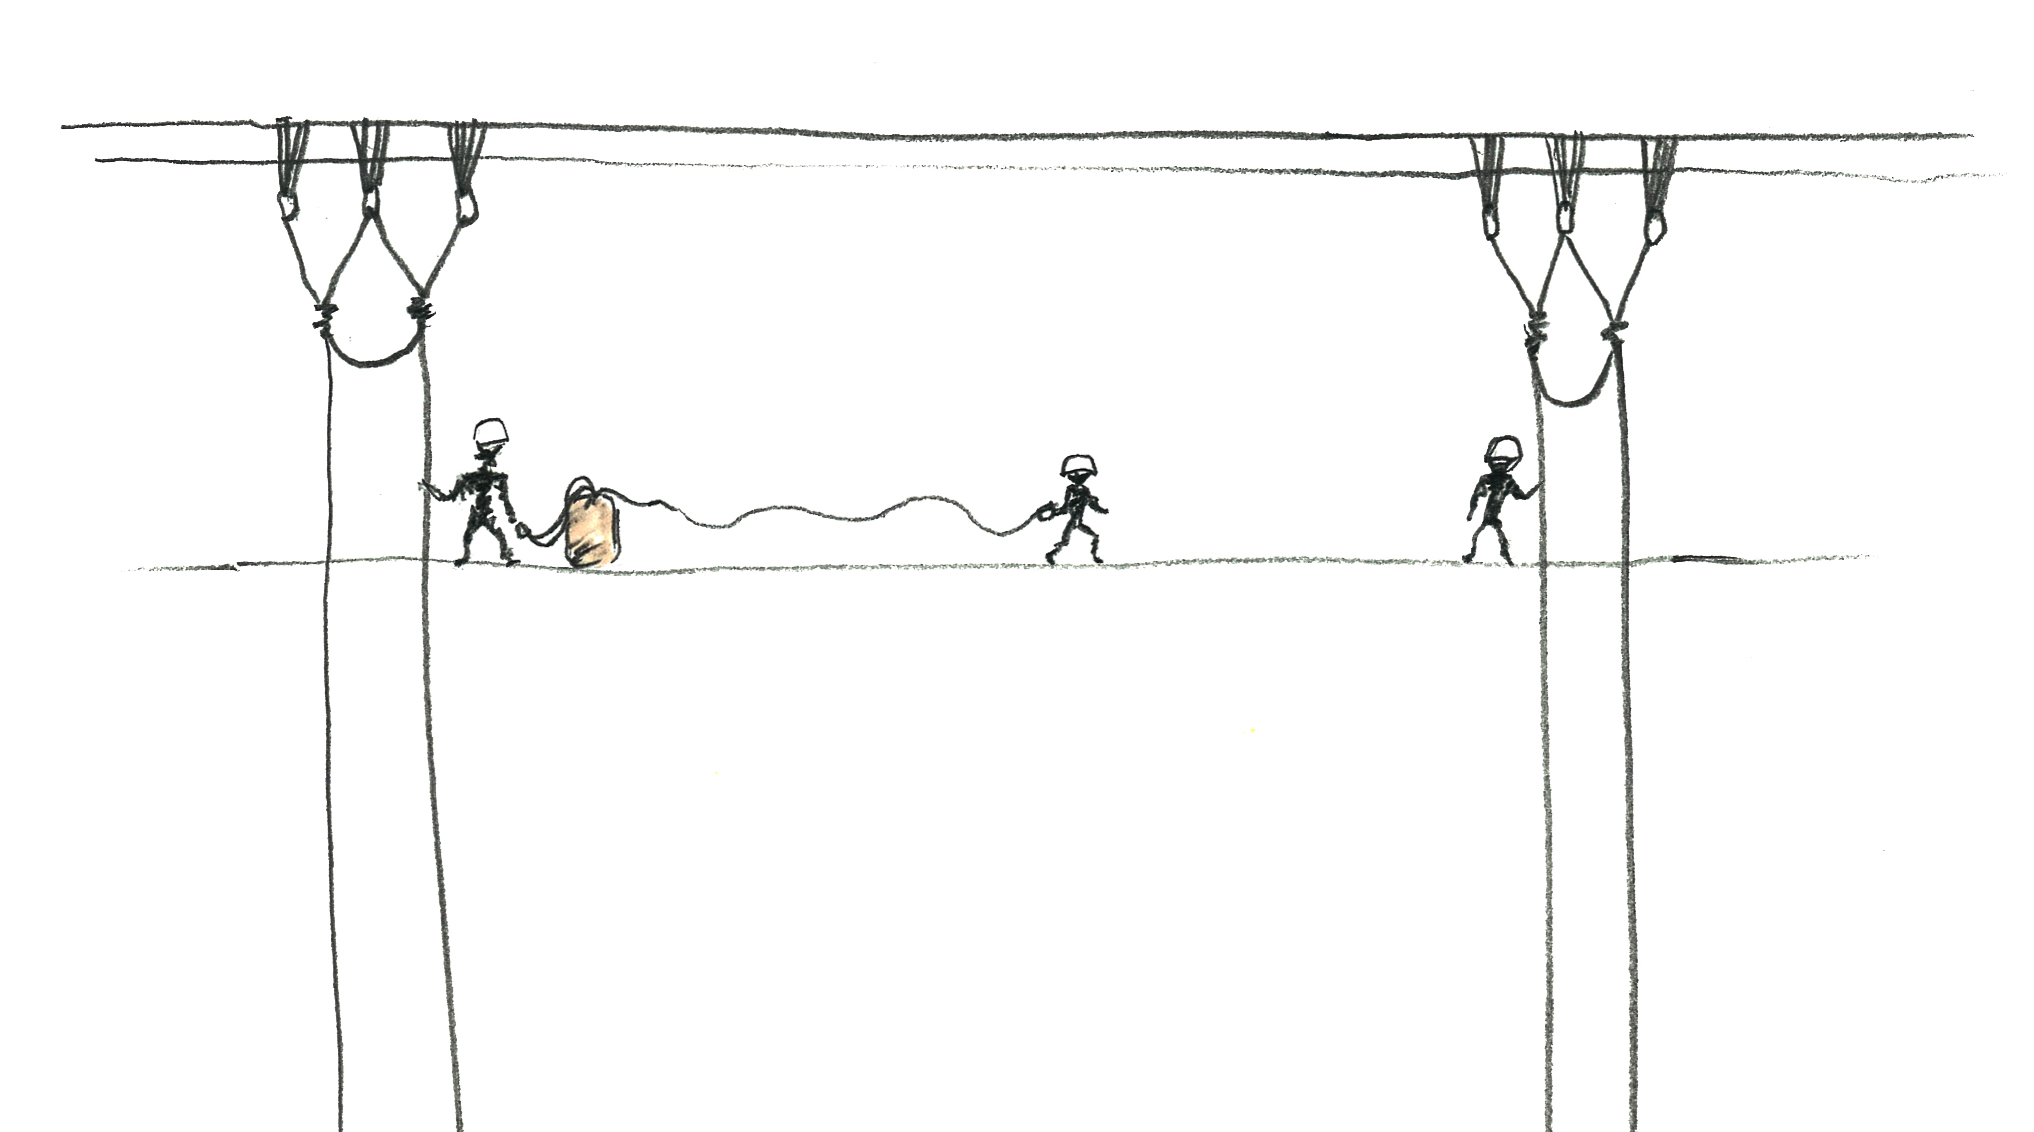
 G
G
