4.8.15 | Updated with additional insight, video, and revised topo
As I write this a multi-national team of six climbers from Greenpeace are camped beneath the main deck of Shell’s Arctic-bound oil rig, the Polar Pioneer. Greenpeace intercepted the oil rig the morning of April 6, 2015 in the middle of the Pacific Ocean, 750 miles north-west of Hawaii, in protest of Shells plans to drill in the Arctic. The Polar Pioneer is being transported on a 712 foot long heavy-lift vessel called the Blue Marlin and is on route to Seattle where it will meet up with the rest of Shells drill fleet before heading to the Alaskan Arctic.
Why are they doing this? Read this campaign briefing on Shell’s Arctic failures to learn more and hear what the climbers have to say in the video below.
I’ve seen Greenpeace climbers scale oil rigs before but I found myself intrigued by the intricacies of this climb as I looked thru photographs and followed social/mainstream media. The climb is not over but one thing is for sure — the skill demonstrated by the climbers is impressive and worth noting.
The Climb | April 6, 2015
Note: The following account is an attempt to cover the ascent of Greenpeace climbers as they made their way up the Polar Pioneer oil rig. It’s accuracy cannot be guaranteed as details can only be verified by the climbers themselves.
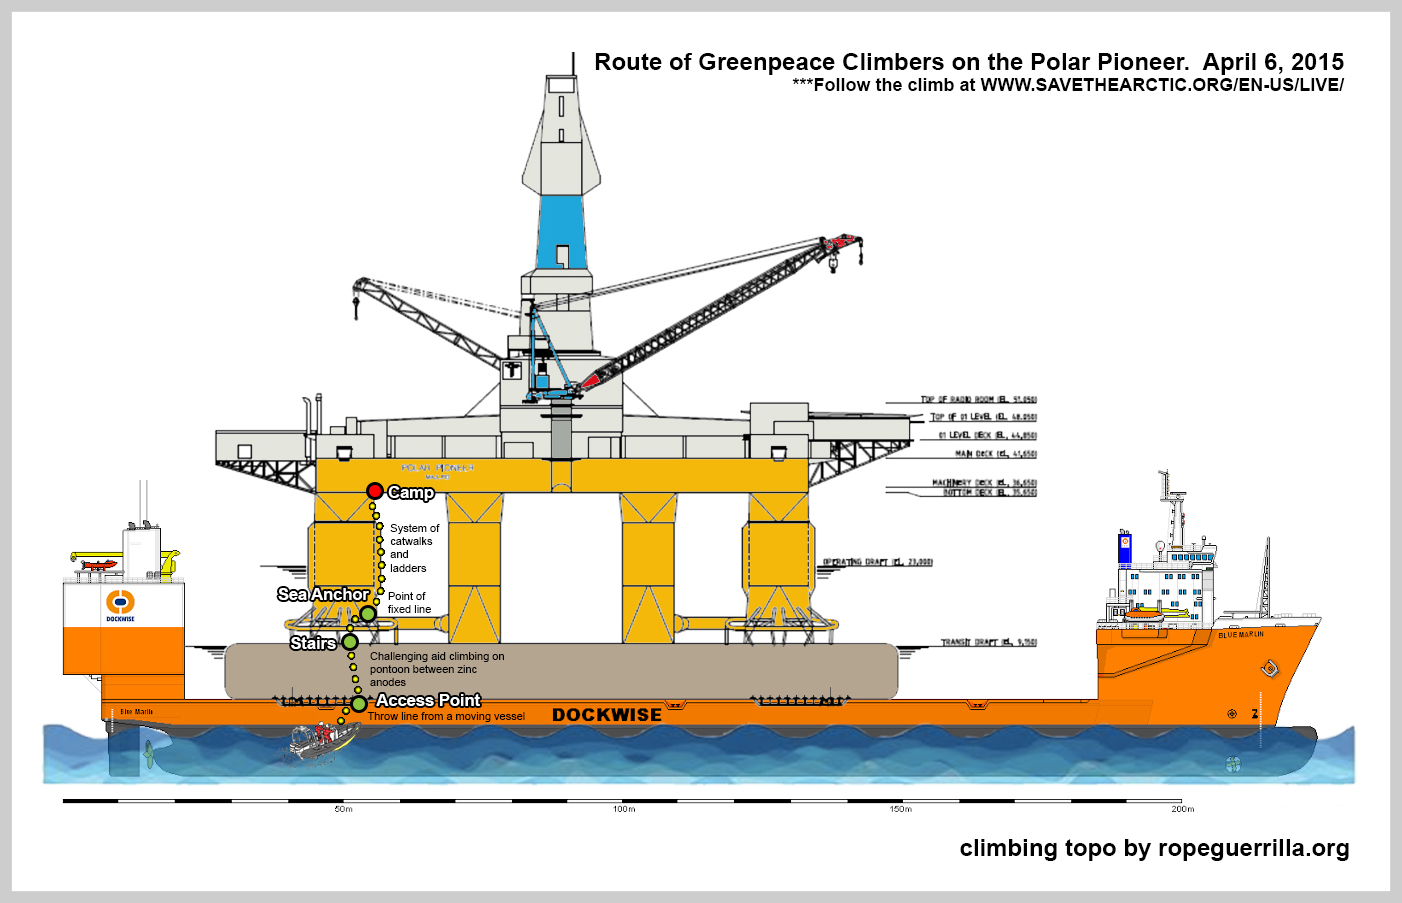
A team of six climbers — Andreas Widlund from Sweden, Aliyah Field from the USA, Johno Smith from New Zealand, Miriam Friedrich from Austria, Zoe Buckley Lennox from Australia, and Jens Loewe from Germany — left the Esperanza shortly after 0600 onboard an inflatable boat which they used to access the base of the oil rig on the starboard side. It was from this point that a throw line was used to gain access to one of the skids hanging beneath the pontoon of the rig.
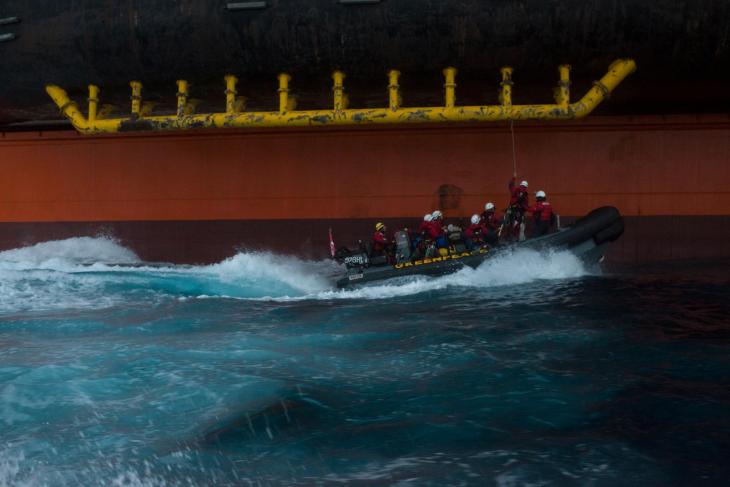
Greenpeace climbers come along side the Blue Marlin where they gain access to a skid of the Polar Pioneer and begin their climb. (Photo: Vincenzo Floramo/Greenpeace)
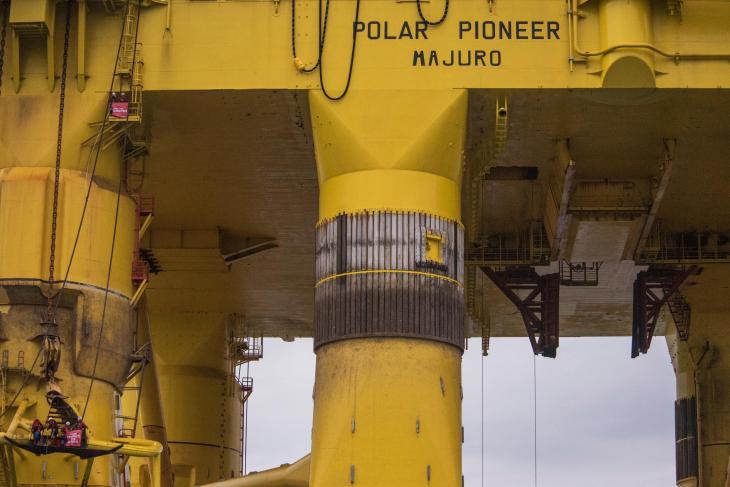
What follows is likely the most technical climbing thus far. A section of aid climbing that many would try to avoid. This first portion of the climb navigates a series of what appear to be sacrificial zinc anodes going up the side of the pontoon. It was climber Andreas who led this section using an extendable pole with a hook on the end (often referred to as a “cheat stick” by climbers). Attached to the hook was a caving ladder. Using the pole he carefully hooked the ladder to the anode above which would otherwise be out of reach. After getting a stable hook placement he free climbed the ladder to the anode where he re-attached himself using a second hook as a temporary anchor. This allowed him to take his weight out of the caving ladder so he could use the extendable pole to reach the next anode — these moves were repeated until he was able to throw a long lanyard to reach the stairwell. The fact that this style of climbing was done on a moving vessel at high seas is extraordinary. Something that was captured thanks to whatever genius suggested using the “cheat stick” as the most bad ass selfie stick ever — as evident in the video below.
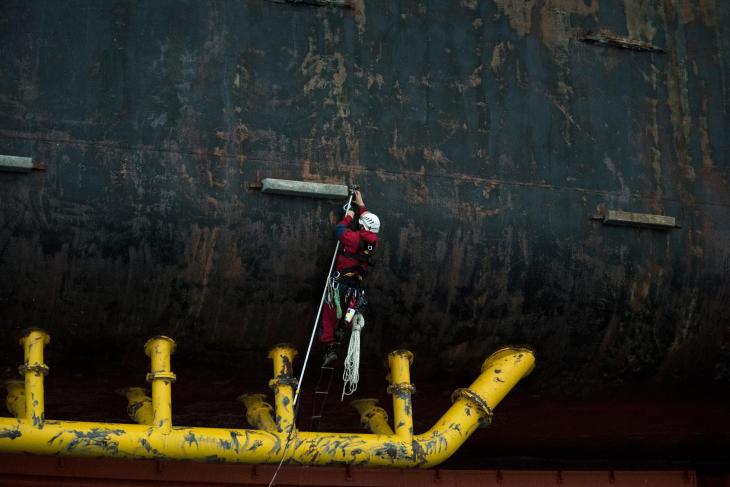
The start of the aid climbing section. (Photo: Vincenzo Floramo/Greenpeace)
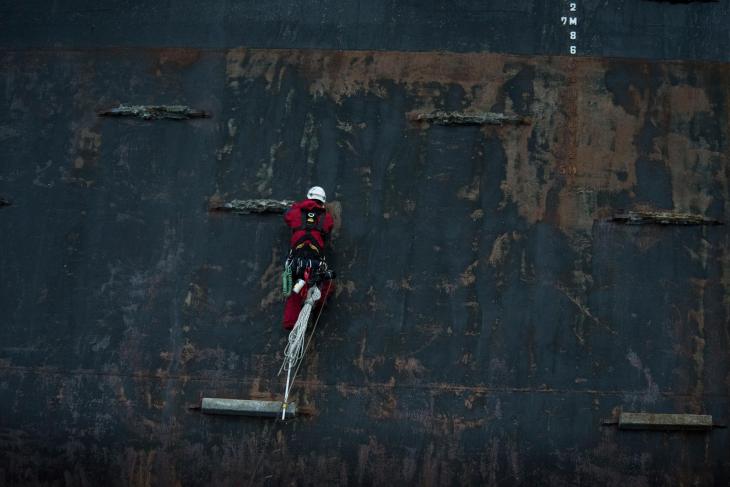
Andreas navigates between sacrificial zinc anodes on the pontoon of the Polar Pioneer. (Photo: Vincenzo Floramo/Greenpeace)
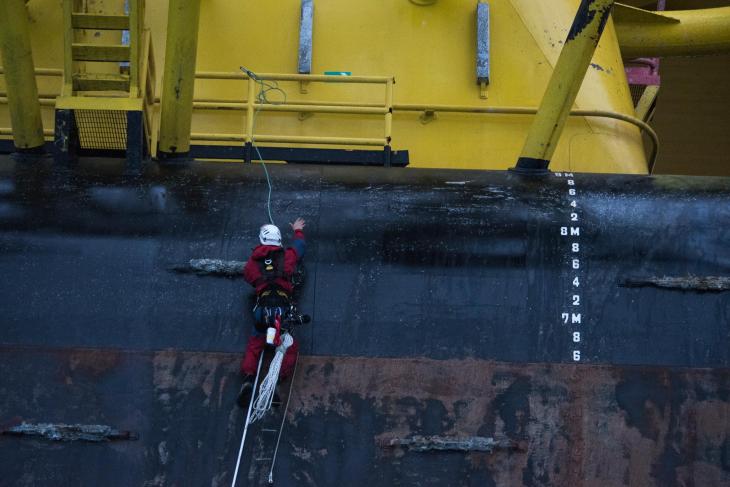
A long lanyard is used to access the stairwell after climbing the pontoon of the Polar Pioneer. (Photo: Vincenzo Floramo/Greenpeace)
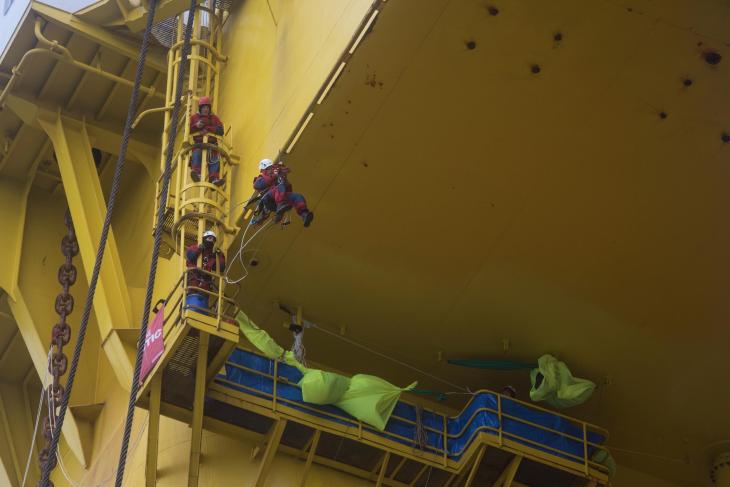
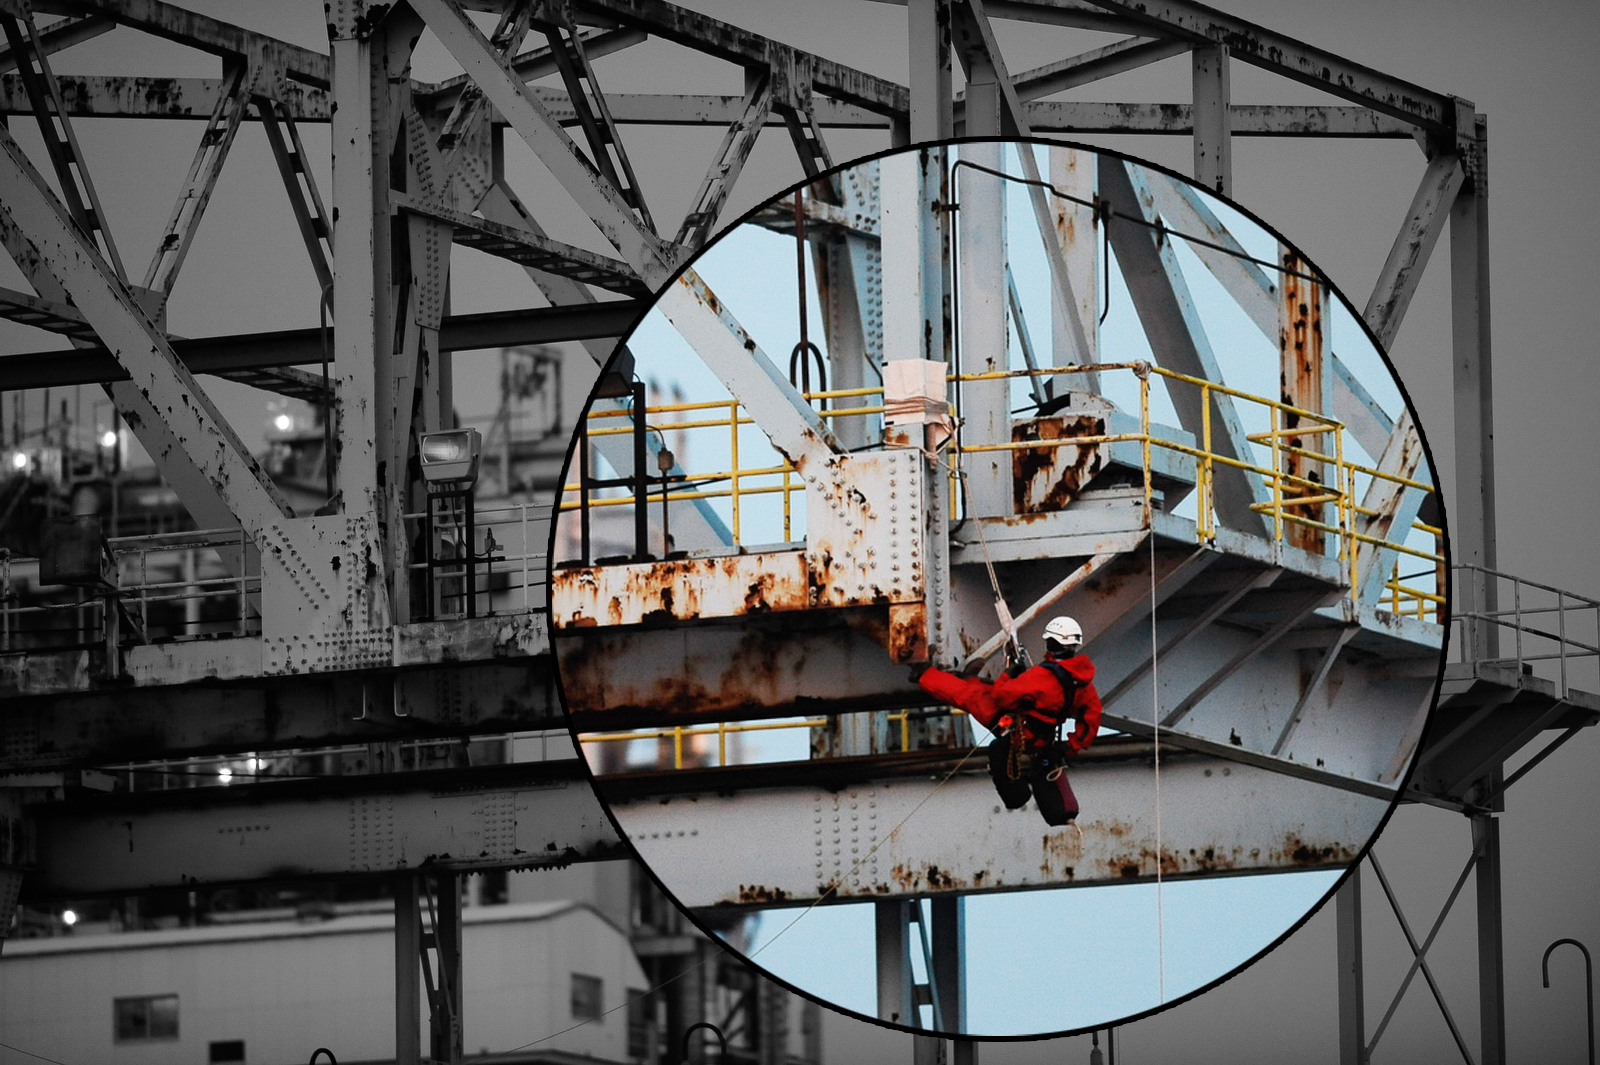
Once at the stairwell Andreas gained easy access to an outer leg of the Polar Pioneer and continued upward to one of the eight sea anchors. It was at this point that he fixed a line for the remaining five climbers to ascend. This proved to be highly efficient as it allowed for the climbers to bypass the pontoon by ascending directly from the inflatable below.
Andreas makes his way up the outer leg of the Polar Pioneer. (Photo: Vincenzo Floramo/Greenpeace)
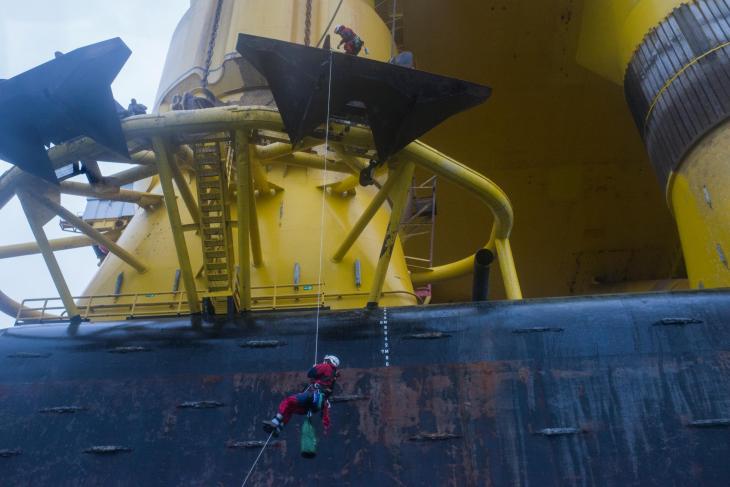
Aliyah climbs a fixed line onto the Polar Pioneer. (Photo: Vincenzo Floramo/Greenpeace)
Jens just before taking his first step onto the Polar Pioneer. (Photo: Vincenzo Floramo/Greenpeace)
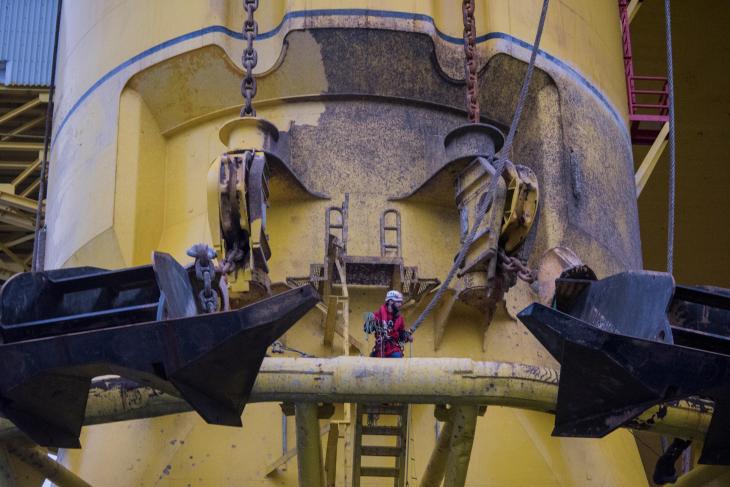
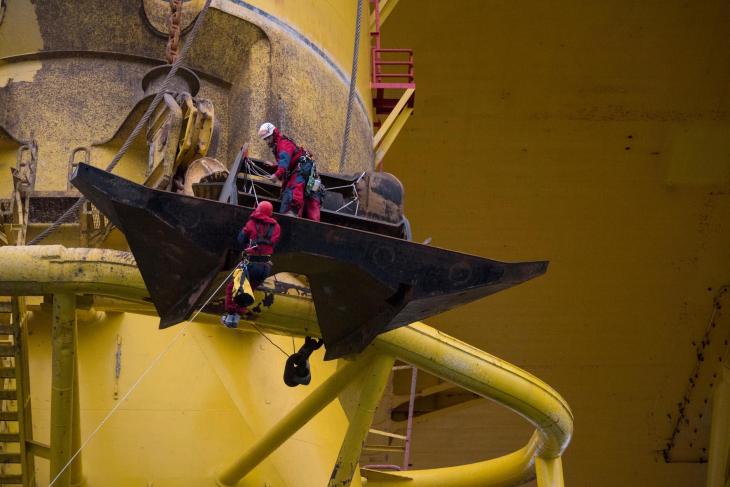
Greenpeace climbers gather at an anchor on the Polar Pioneer during their ascent. (Photo: Vincenzo Floramo/Greenpeace)
Less than an hour from when it began and all six climbers were at the anchor hauling bags with enough rations for 24hrs. From here the climbers continued upward to a high point among catwalks beneath the main deck. It was here where they chose to make camp.
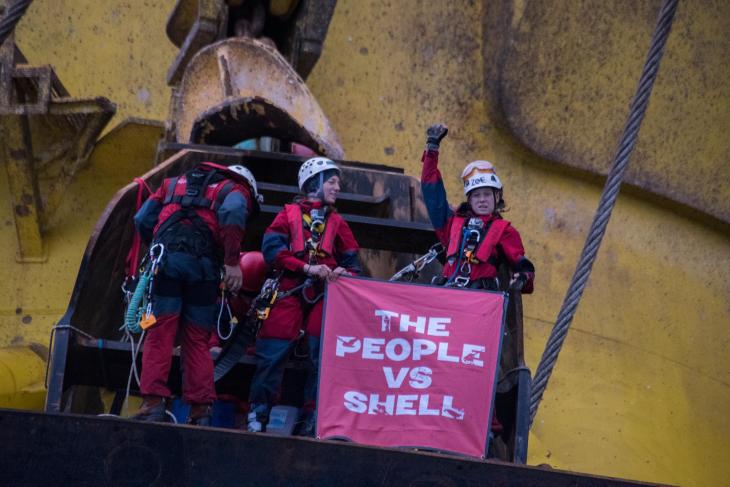
Greenpeace climbers reach their high point beneath the main deck of the Polar Pioneer. (Photo: Vincenzo Floramo/Greenpeace)
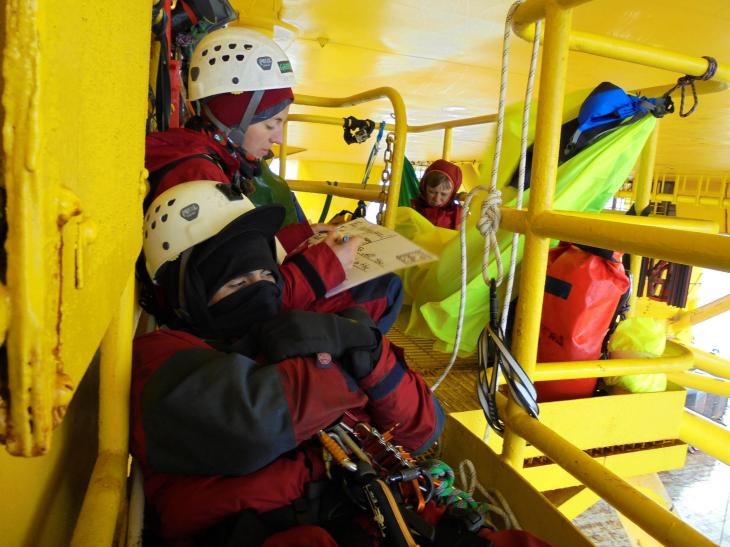
Greenpeace climbers take a moment for some much needed r&r after reaching their high point. (Photo: Jens Loewe/Greenpeace)
A successful resupply of materials from the Esperanza was delivered to the climbers in the afternoon making a prolonged stay possible. Additional footage of the climb can be seen below.
General view of the camp set up by Greenpeace activists underneath the main deck of the Polar Pioneer oil rig more than 24 hours after boarding it in the Pacific Ocean. (Photo: Vincenzo Floramo/Greenpeace)
follow the story at www.savethearctic.org/en-US/live/.
Photo and video courtesy of Greenpeace


 The potential risk for damage from abrasion or cutting must be evaluated and eliminated anytime softgear makes contact with something. This is particularly true anytime softgear runs over an edge or rubs on itself since the components of softgear, nylon and polyester, are not very resistant to abrasion or heat. Remember – rope and webbing are extremely strong when pulled under load but can cut quickly when subjected to lateral abrasion while under tension.


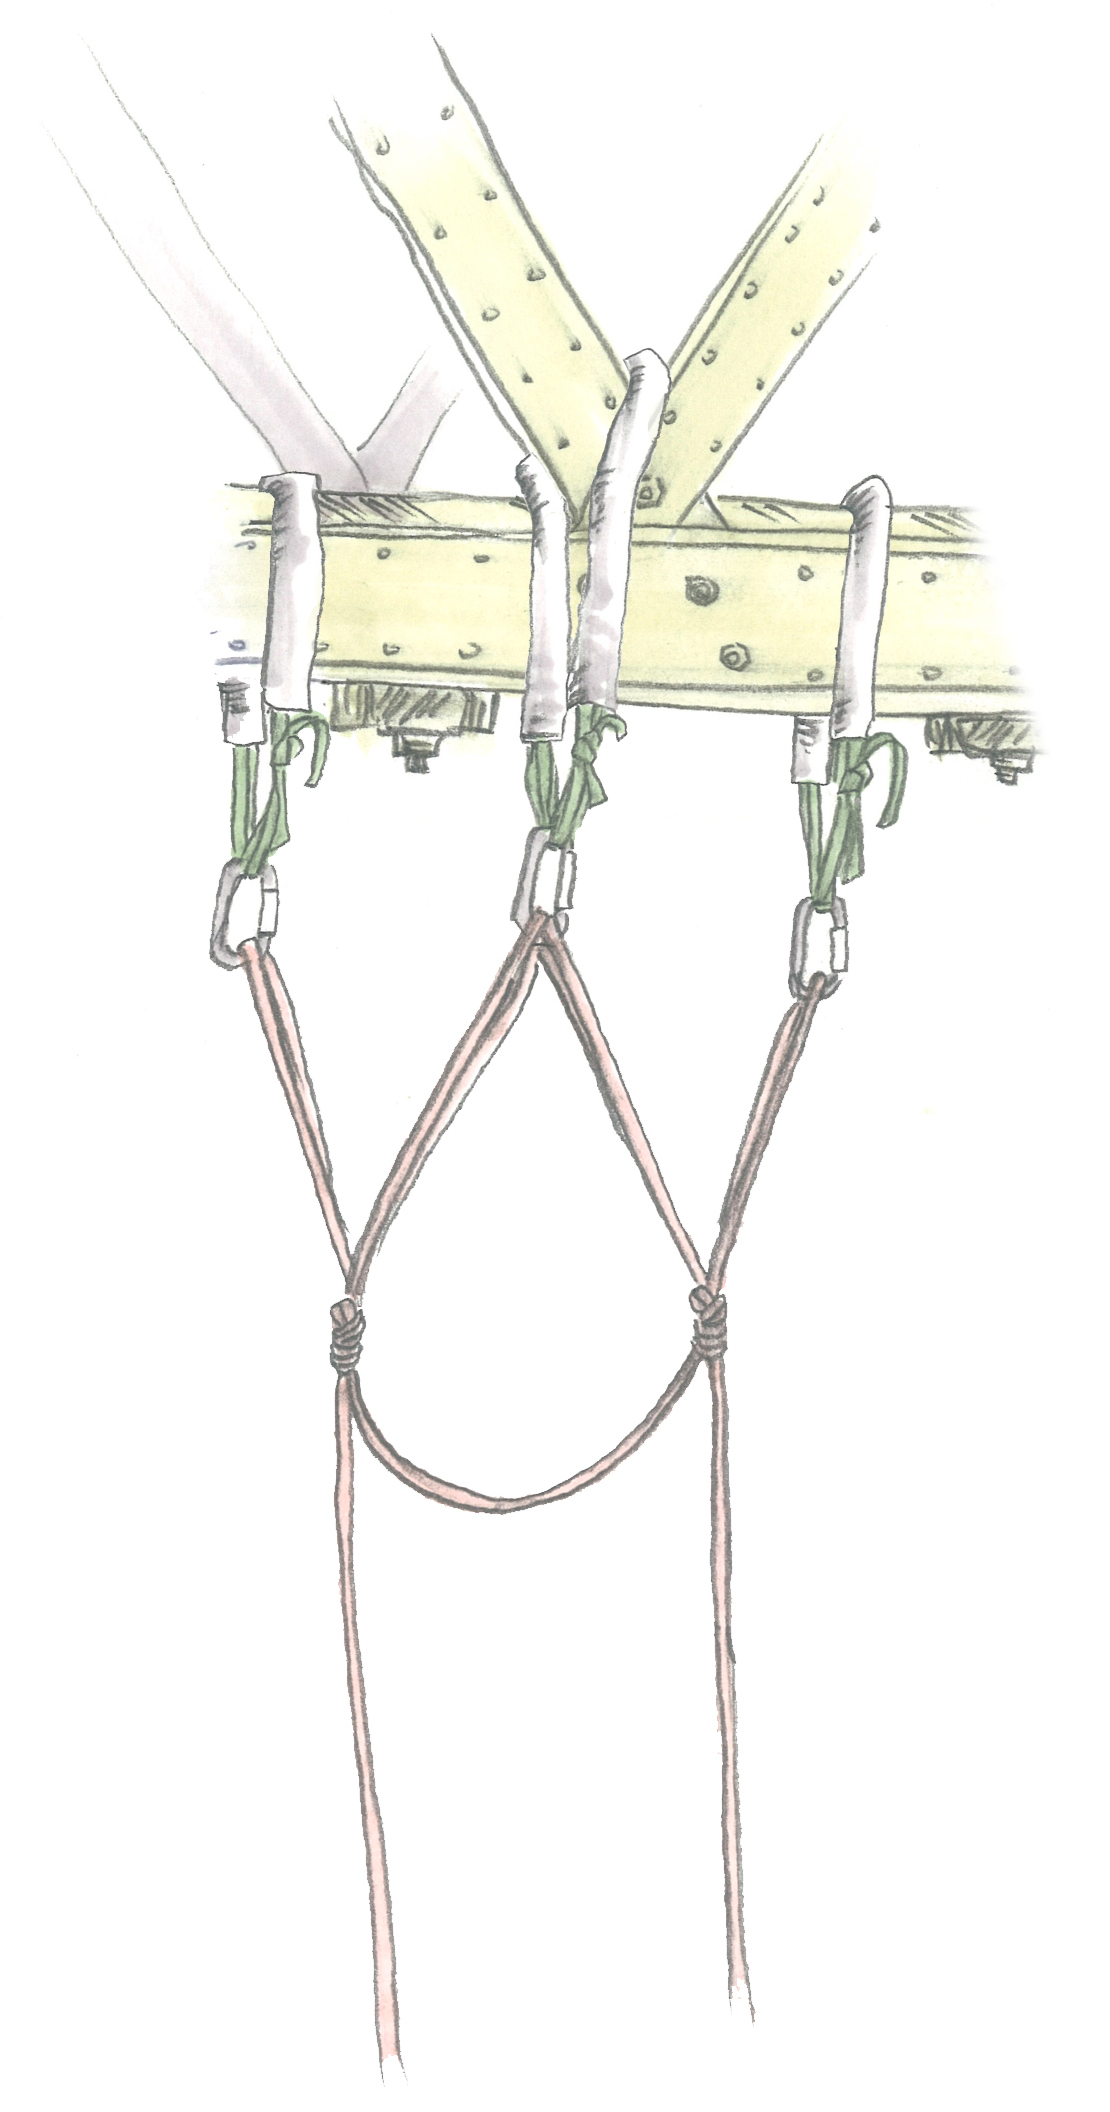

 Check all connections inline (carabiner to lanyard to you).
 D
D E
E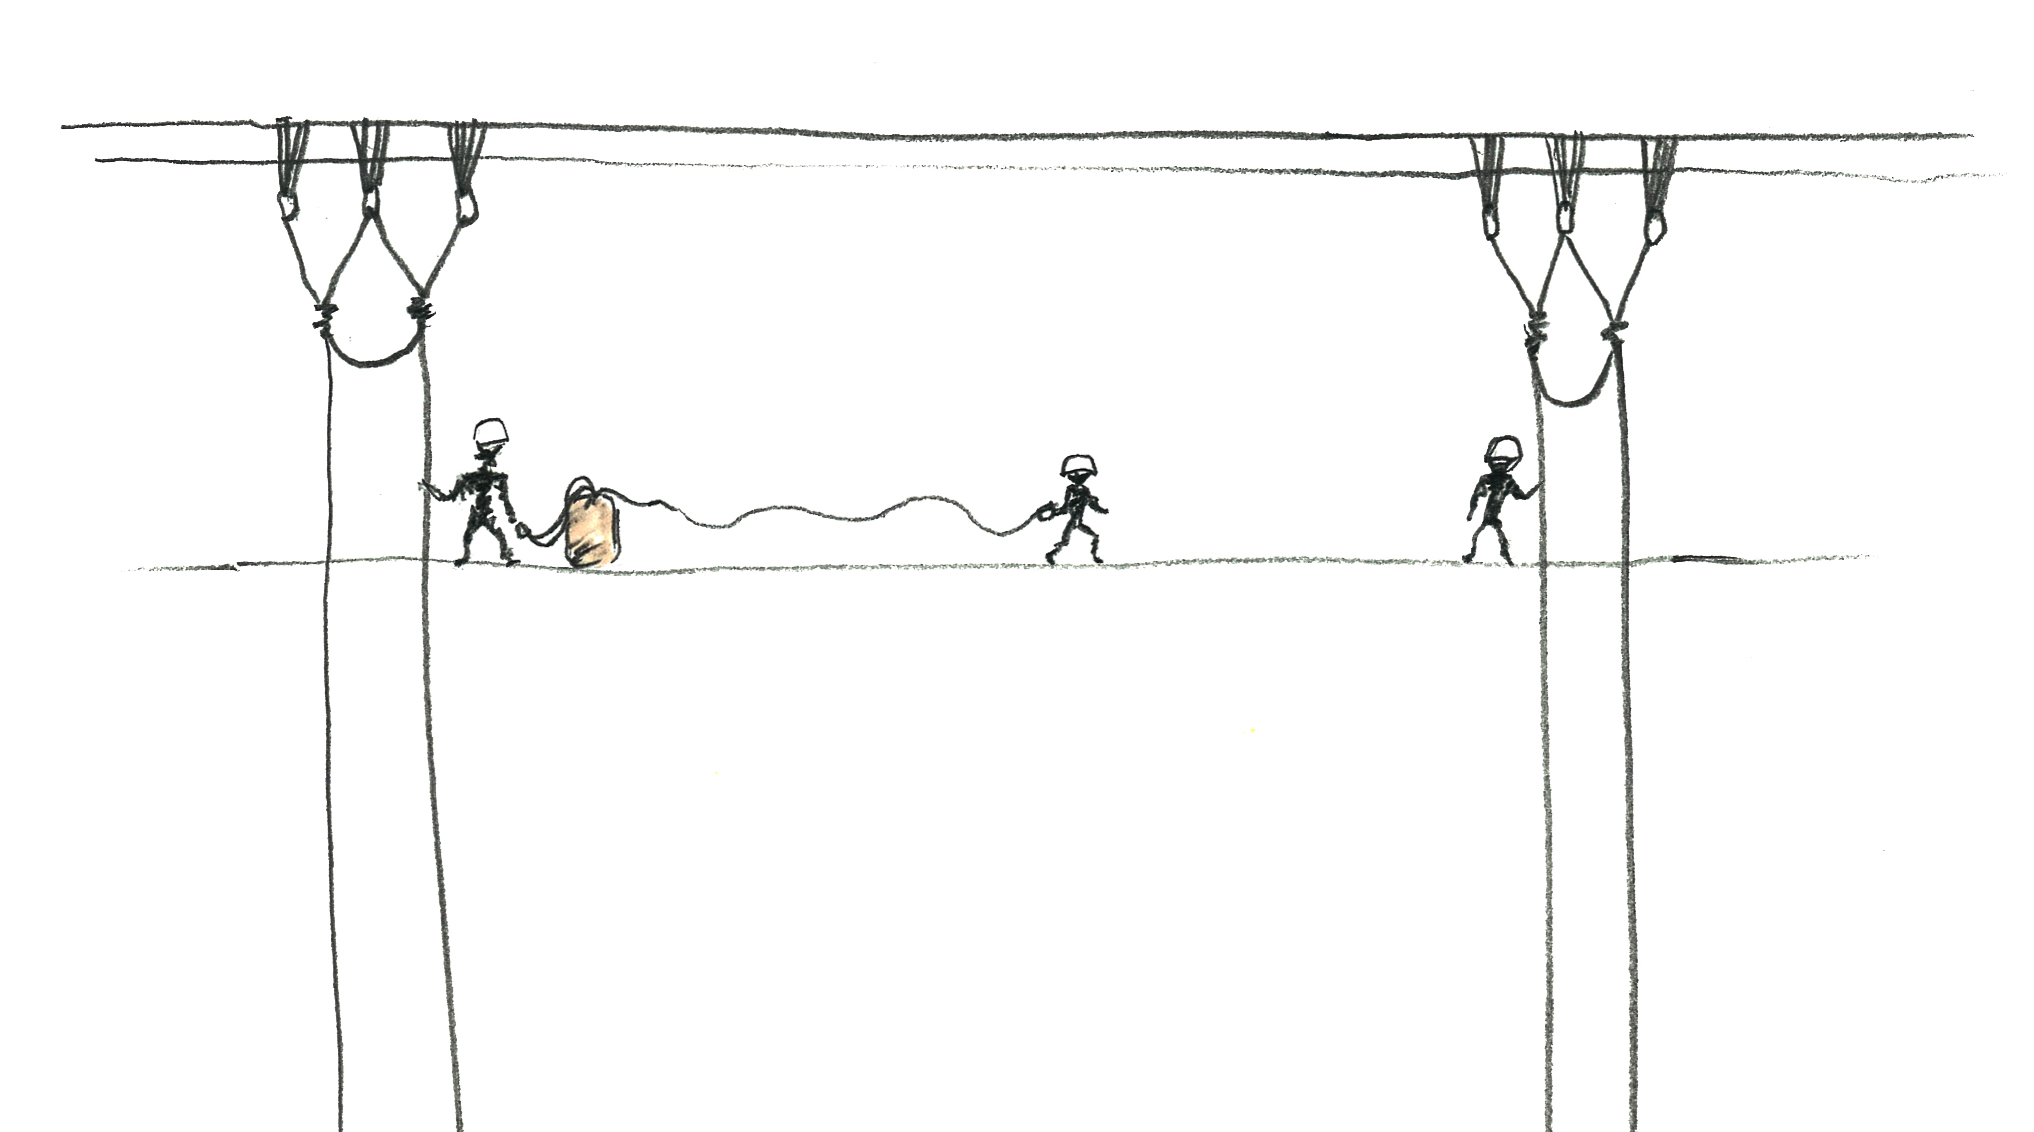
 G
G
